YOLO Integration with ROS and Running with CUDA GPU
Integrating You Only Look Once (YOLO), a real time object detection algorithm commonly used in the localization task, with ROS might pose a real integration challenge. There are many steps that are not well documented when installing the package in ROS. There is even more difficulty if one tries to switch from using the default CPU computation to using CUDA accelerated GPU computation as a ROS package.
This article serves as a step-by-step tutorial of how to integrate YOLO in ROS and enabling GPU acceleration to ensure real-time performance. The tutorial will detail two main aspects of the installation: integration with ROS and setting up CUDA. The CUDA acceleration section is stand-alone, and if you have already installed YOLO and want GPU acceleration, you can simply skip the first part.
Integrating YOLO with ROS
To install YOLO in ROS, we will use a YOLO ROS wrapper GitHub repository darknet_ros. You can simply follow their instructions in the README or follow the instructions below.
Before you start the integration, make sure you have prepared your pre-trained YOLO model weights and configurations. Based on the detection task, the pre-trained model weights may differ. If your task requires objects that are not included in the default YOLO dataset (which uses VOC or COCO dataset to train), you will need to search for other pre-trained open-source projects and download their model weights and configurations to your local machine. Otherwise, you would need to train YOLO from scratch with your own dataset. The details will not be included in this article, but you may find this article helpful in learning how to do so: Tutorial
Requirements
-
Ubuntu: 18.04
-
ROS: Melodic
-
YOLO: The official YOLO ROS wrapper GitHub repo darknet_ros currently only supports YOLOv3 and below. If you are using YOLOv4, try this repo instead yolo_v4
Steps
-
Download the repo:
cd catkin_workspace/srcgit clone --recursive git@github.com:leggedrobotics/darknet_ros.gitNote: make sure you have
--recursivetag when downloading the darknet packagecd ../ -
Build:
catkin_make -DCMAKE_BUILD_TYPE=Release -
Using your own model:
Within
/darknet_ros/yolo_network_config:-
Add .cfg and .weights (YOLO detection model weights and configs) into /cfg and /weights folder
-
Within /cfg, run
dos2unix your_model.cfg(convert it to Unix format if you have problem with Windows to Unix format transformation)
Within
/darknet_ros/config:-
Modify “ros.yaml” with the correct camera topic
-
Create “your_model.yaml” to configure the model files and detected classes
Within
/darknet_ros/launch:- Modify “darknet_ros.launch” with the correct YAML file (“your_model.yaml”)
-
-
Run:
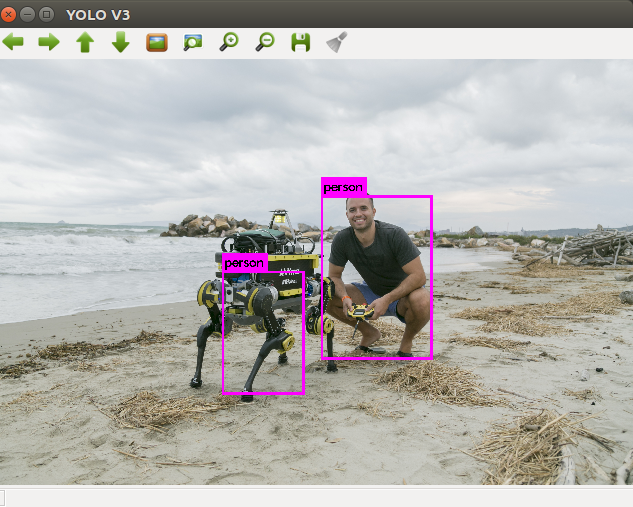
catkin_makesource devel/setup.bashroslaunch darknet_ros darknet_ros.launchAfter launching the ROS node, a window will automatically appear that will show the RGB stream and detected objects. You can also check the stream in RVIZ.
ROS Topics
-
Published ROS topics:
- object_detector (
std_msgs::Int8) Number of detected objects - bounding_boxes (
darknet_ros_msgs::BoundingBoxes) Bounding boxes (class, x, y, w, h) details are shown in/darknet_ros_msgs - detection_image (
sensor_msgs::Image) Image with detected bounding boxes
- object_detector (
Setting up YOLO with CUDA GPU Acceleration
You may find that running YOLO through the CPU is very slow. To increase run-time performance, you can accelerate it by using a CUDA enabled GPU.
Note: darknet currently only supports (last updated 2021) CUDA 10.2 with cuDNN 7.6.5 and below. If you are using CUDA 11+ or cuDNN 8.0+, you probably need to downgrade CUDA and cuDNN for darknet to work.
Here are the detailed instructions on installing CUDA 10.2 and cuDNN 7.6.5:
Installing CUDA 10.2:
We will follow most of the instructions shown in this tutorial
Note: If there is a usr/local/cuda directory in your local machine, remove it (sudo rm -rf /usr/local/cuda) before proceeding with the following steps below.
Also, the first step will remove your display driver. This is ok, as when CUDA is reinstalled your display driver will also reinstall automatically.
-
Remove all CUDA related files already in the machine:
sudo rm /etc/apt/sources.list.d/cuda* sudo apt remove --autoremove nvidia-cuda-toolkit sudo apt remove --autoremove nvidia-* -
Install CUDA 10.2:
sudo apt update sudo apt install cuda-10-2 sudo apt install libcudnn7 -
Add CUDA into path:
sudo vi ~/.profileAdd below at the end of .profile:
# set PATH for cuda installation if [ -d "/usr/local/cuda/bin/" ]; then export PATH=/usr/local/cuda/bin${PATH:+:${PATH}} export LD_LIBRARY_PATH=/usr/local/cuda/lib64${LD_LIBRARY_PATH:+:${LD_LIBRARY_PATH}} fi -
Check CUDA version (make sure it is 10.2):
nvcc -V
Installing cuDNN separately:
-
Go to this page, you may need to register an account with NVIDIA to access that link.
-
Download all three .deb: runtime/developer/code-sample (make sure that it’s the correct version:
cuDNN 7.6.5 with CUDA 10.2) -
In Terminal:
Go to the package location and install the runtime library, developer library, and (optional) code samples:
sudo dpkg -i libcudnn7_7.6.5.32–1+cuda10.2_amd64.deb sudo dpkg -i libcudnn7-dev_7.6.5.32–1+cuda10.2_amd64.deb sudo dpkg -i libcudnn7-doc_7.6.5.32–1+cuda10.2_amd64.deb -
Check cuDNN version:
/sbin/ldconfig -N -v $(sed 's/:/ /' <<< $LD_LIBRARY_PATH) 2>/dev/null | grep libcudnn -
Optional:
If you cannot locate cudnn.h, or the later compilation fails with
not found cudnn.hmessage:Copy
cudnn.h(in/usr/include) to (/usr/local/cuda/include):
sudo cp /usr/include/cudnn.h /usr/local/cuda/includeCopy
libcudnn*(in/usr/lib/x86_64-linux-gnu) to (/usr/local/cuda/lib64):
sudo cp /usr/lib/x86_64-linux-gnu/libcudnn* /usr/local/cuda/lib64
Running YOLO with GPU Acceleration:
The process listed below will work whether you are using YOLO through the darknet_ros package or as a standalone program:
- Modify /darnet_ros/darknet/Makefile:
GPU = 1
CUDNN =1
OPENCV = 1
Add your GPU Architecture (ARCH) value. Note: you can find your ARCH value online here.
The values specified below correspond to a NVIDIA RTX 2070:
-gencode=arch=compute_75,code=compute_75 -
Run
makein/darknet_ros/darknet -
Modify
/darknet_ros/darknet_ros/CmakeList.txt:-gencode=arch=compute_75,code=compute_75 - Run
catkin_makein the/catkin_wscontaining thedarknet_rospackage
GPU Acceleration is Ready!
Summary
In this tutorial, we went through the procedures for integrating YOLO with ROS by deploying a ROS wrapper. Depending on the task, the YOLO model weights and configuration files should be added into the ROS package folder. By modifying the ROS wrapper configuration and launch file, we were able to run YOLO in ROS Melodic.
We also demonstrated how to setup CUDA and cuDNN to run YOLO in real-time. By following our step-by-step instructions, YOLO can run with realtime performance.
See Also
Further Reading
References
- https://github.com/leggedrobotics/darknet_ros
- https://medium.com/@exesse/cuda-10-1-installation-on-ubuntu-18-04-lts-d04f89287130
- https://pjreddie.com/projects/pascal-voc-dataset-mirror/
- https://cocodataset.org/#home
- https://github.com/tom13133/darknet_ros/tree/yolov4