Custom data-set for segmentation
Image segmentation can be useful in a lot of cases, for example, suppressing pedestrains, cars for your SLAM system so the extracted features belong to static scene only. This tutorial covers the procedure to create annotations for semantic segmentation task. This is useful when you want to outsource the labeling tasks to external companies because guidelines and examples are usually required in such scenario. Specifically, GIMP (GNU Image Manipulation Program version 2.8.22) on Ubuntu (16.04 for this tutorial) will be used to do the annotating task.
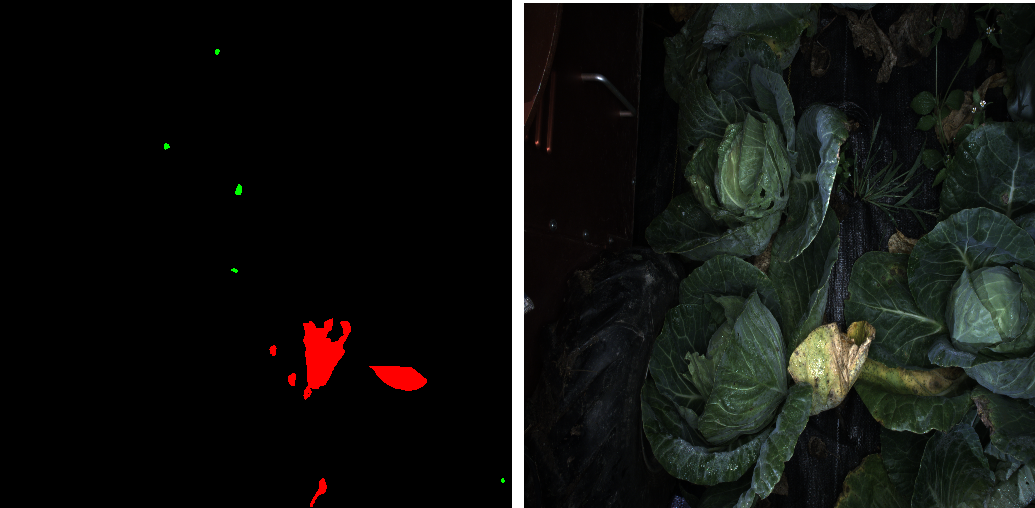
Example of segmented images
Below is an example of annotated image and it’s original RGB image. Three classes: fungus (annotated red), holes (annotated green) and background (annotated black) are presented here. Although it’s common to use gray image with pixel value corresponding to 0 - 255, using a color annotation makes it much easier to visualize the annoation. The conversion from color to class labels can be easily done when the actual training is performed e.g. a mapping from RGB tuple to integers.
Example code for converting RGB tuple to integer
color_of_interest = [
    (0, 0, 0),
    (255, 0, 0),
    (0, 255, 0)]
class_map = dict(zip(self.color_of_interest, range(3)))

def encode_segmap(self, mask):
	for color in self.color_of_interest:
    	mask[ (mask[:,:,0] == color[0]) &\
        	(mask[:,:,1] == color[1]) &\
        	(mask[:,:,2] == color[2])   ] = class_map[color]
    return mask[:, :, 0] # target should be h x w, no depth
Installing gimp
copy and paste the following command in your terminal to install gimp
sudo apt-get update
sudo apt-get install gimp
Procedure to annotate an image
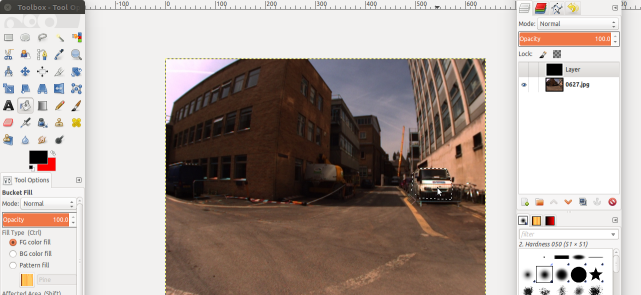
Step 1 Load image
Navigate to file->open botton on the top left to open a rgb image that you’d like to annotate
Step 2 Create mask
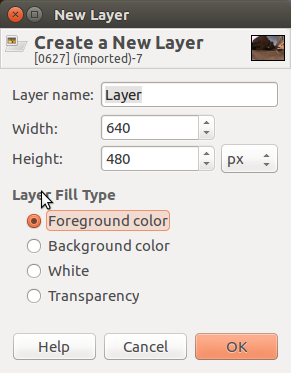
Navigate to layer->new layer to create a mask over your image. Choose Foreground color will create a black layer over your image. You can also change the foreground color on the left panel before you create a new layer, this will give you a layer with different color (which would corresponds to background in this tutorial)
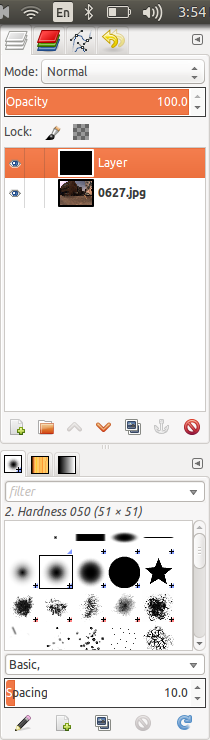
After creating new layer, you will see your newly created layer on the right panel. Click on the eye symbol and make the layer invisible.
Step 3 Creating annotations
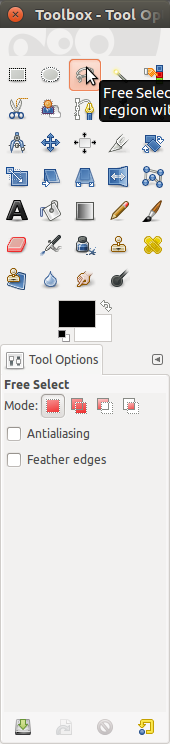
Select the free select tool on the left panel. IMPORTANT: Uncheck the anti-aliasing option, otherwise non-solid colors will appear at the edge of your annotations. Select the region of interest, and then use bucket fill tool to fill in color annotation. Click on the eye symbol again on the right panel will show you the annotated layer.
Step 4 Saving files
Hit ctrl+E to export your layer as an png image, which is your label for this image. Hit ctrl+S to save the gimp file as .xcf file. This step is important if you want to modify your annotation in the future.
See Also:
- Semantic segmented images are sufficient for many architectures e.g. Unet, but if you’d like to work with Mask-RCNN, a .json file is required for training. Here’s a decent tutorial